Saturday, August 1, 2009
Recipe: Turkey Chicken Burgers!!!!!!
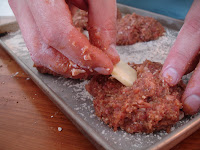
Recipe: Turkey and Chicken Burgers stuffed with Cheese
Patties:
1 pd ground Turkey
1 pd ground Chicken
1 tbsp roasted paprika
1 tbsp dried oregano
2 tsp sea salt
15 peppercorns
1/2 tsp cayenne
2 tbsp Worcestershire sauce
1 egg
1/4 cup of flour
8 slices of Gouda (about 1x1x1/8 inch)
Other:
French artisan buns
Bacon
Gouda
Ketchup
Lettuce
Tomatoes (very thinly sliced)
Click Here to Read More..
Recipe: My Perfect Steak
| So everyone and their father has their perfect steak and are the master of the BBQ, it is a thing of pride with a man to cook the perfect steak. The problem is that not everyone's father was actually that great at BBQing, hence here are my tips and thoughts on the perfect grilled steak. Steak is probably one of the meals I have been trying to perfect the longest, as it was a high-school and university tradition to pick up a steak on a Friday night before heading to the bars. I would love to hear any feedback if you think you have ideas to improve the steak. |
Recipe: My Perfect Steak
1 pd, 1 inch thick Rib Roast (Bone-in Ribeye)
2 tsp sea salt
1 tsp pepper
1 tsp garlic powder (you can use the real thing, but I found this is better for flavour and application)
1/2 cayenne powder
1 tbsp olive oil
The recipe and technique can easily be used for a strip loin, porterhouse / t-bone and some sirloins. As you get into the tougher cuts like flank, this marinade and preparation will not break done the meat enough, hence I would not recommend it.
Start by removing the steak from the fridge about 1-2 hours before you plan on grilling. This is so the meat is at room temperature when you are ready to cook so that the steak cooks evenly throughout. About 20 minutes before grilling apply half the sea salt, pepper, garlic powder, cayenne and olive to each side and rub in well. A couple of points, although salt adds great flavour, it can also draw out a lot of moisture, hence marinating the steak for too long can actually dry the meat out. Along the same lines, meat actually absorbs oil thus mixing the rub with the oil helps the flavour penetrate past the skin.
 Turn on the BBQ to high and let heat while the steak quickly marinades. I like my BBQ to be about 500F-600F. Place the steak at a 45 degree angle on the grill and slightly turn down the flame to minimize flare ups. It is a fine balance between having the BBQ as hot as possible, but avoiding flames. If you do get flare ups, I like to use a turkey baster and a glass of water. The Ribeye should take about 3-4 minutes per side for medium rare. To get that steakhouse look, turn the Ribeye 90 degrees half way through grilling each side (this is another reason your grill need to be hot when you put the steak on). Once done, remove the Ribeye from the grill and let sit about 10 minutes for the meat to re-absorb the juices. Grab your favourite California Cabernet Sauvignon, Australian Shiraz or beer and enjoy!
 Click Here to Read More..
Friday, July 31, 2009
Recipe: Baileys Chewy Chocolate Chip Cookies
| I found the base of this recipes online back when I was in fresh out of university(dont remember where or I would give them some credit), although I had a decent job, I couldn't bare wasting the white of an egg, hence I substituted Bailey's for the egg yolk and the rest is history! Enjoy |
Recipe:Bailey's Chewy Chocolate Chip Cookies
2 cups spelt flour (add more flour until the dough is not sticky)1/2 Tsp baking soda
1/2 Tsp salt
3/4 cup unsalted butter, room temperature
1 cup packed brown sugar (you can use a little less if you want for both white and brown sugar)
1/2 cup white sugar
2 Tsp vanilla extract
1 egg
1 Tbsp Baileys (substitute with an egg yolk if you do not want to use baileys)
2 cups semisweet chocolate chips
 Preheat the oven to 325F. I love using clay cookie sheets or silpat as if keeps the bottoms from burning and keeps the cookie chewy. if you need to use a cookie sheet, watch the bottoms very close, so they do not burn, their is a lot of sugar in these and they burn easily. In a medium bowl, cream together the melted butter, brown sugar and white sugar until well blended. eat in the vanilla, egg, and baileys until light and creamy. Sift in the the flour, baking soda and salt. Mix in the sifted ingredients until blended. Stir in the chocolate chips by hand using a wooden spoon. I like to do very small cookies, about a tablespoon each, but you can change the size, just adjust cooking time accordingly. Bake for 10 - 15 minutes in the preheated oven.
Click Here to Read More..
Wednesday, July 29, 2009
Organic Debate? Not for me...
I read an interesting article from an LA Times columnist 'Organic' debate goes on, naturally. I have never read his stuff before and am sure his intentions are good, but for me he completely misses the point of organics. Like anything else, nothing is perfect, including organic control boards (and I am sure somebody is making a lot of money off people certifying organic), but and it is a huge but, it is the intention. The writer seems to look for small holes that he can blanket the entire organic industry under to imply it is a farce, or unnecessary.
Reality for me, living in Kitchener, Ontario, is that I can get local fruits and veggies a few months a year and it is a little challenging finding natural / organic even at the local market. Hence, my only choice is to visit local organic grocers and and buy organic products at the supermarket because I want the fewest chemicals possible in my foods, period. I have made the conscious choice to be healthy and try to provide the healthiest environment for kids. This combined with seeing a family member completely reverse a supposedly incurable disease with natural products makes it a no brainer for me and my family.
When I see a writer giving doubt to people who are wavering between organic and "conventional" (weird term consider conventional has only been around a few decades and is constantly changing) it upsets me. The fewer people who choose organics means less of a market for me as demand decreases. The last thing we need in this world is lower demand for natural products. If you live in a California and you have time to visit every farm you purchase products from, that is awesome, but for me I need a designation that at least I know I am doing the best I can! Click Here to Read More..
Recipe: Halibut Update
I love to try new rubs, so last night I came up with a new recipe for halibut. The last halibut recipe I posted is my classic go-to rub, but this new rub plays off the halibut`s ability to take on a sweet flavour but balances it with a little heat and salt. Switch out the rub ingredients in my crusted halibut recipe with the following but remember to keep the flour.
Halibut Rub Recipe:
1 tbsp brown sugar
Pinch of Cayenne
1 tsp salt
1 tsp basil
Finish with a wedge of lemon and you`ve got perfection!
Click Here to Read More..
Halibut Rub Recipe:
1 tbsp brown sugar
Pinch of Cayenne
1 tsp salt
1 tsp basil
Finish with a wedge of lemon and you`ve got perfection!
Click Here to Read More..
Tuesday, July 28, 2009
Recipe: Balsamic Dijon Salmon
Keeping with the summer theme and the upcoming long weekend, below is one of my favorite Salmon recipes and one that is great (with a little planning) for a gourmet meal at the campsite.
Recipe: Balsamic Dijon Salmon
Ingredients:
1 Pd Salmon (preferably fresh wild sockeye)
1 tbsp Butter
1 tbsp Honey
2 tbsp Balsamic Vinegar
1-2 cloves of Garlic
1 tbsp Dijon Mustard
Pinch of Sea Salt and Pepper
1 Lemon (or as much as needed to cover fish) cut in slices (not wedges)
Cut Salmon into two equal pieces. Mix together butter, balsamic, garlic, Dijon, salt and pepper and pour over salmon, be generous. Place lemon slices on top of Salmon. Place salmon in a tin foil bag (instructions on making a foil bag sealed off so no air can escape. Cook in oven or on BBQ at 500F for about 12-18 minutes depending on thickness of fillet, e.g. tails a little less.
The foil bag should expand from the increased pressure inside, hence to serve simply take a knife and cut a slit down the center of the bag. Take the juices in the foil bag and serve over top of the fish.
Campfire Related Posts:
- Campfire Cooking: Building the Perfect Fire
- Campfire Cooking: The Making of a Foil Bag
Click Here to Read More..
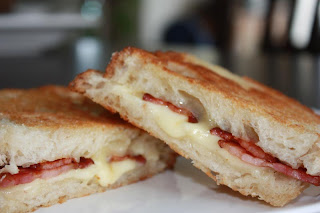
Recipe: Triple Grilled Cheese Sandwich
| Anything that includes cheese, butter and bread is going to be great, but a few simple tips and techniques can take a great sandwich to the perfect grilled cheese! |

Recipe:Perfect Grilled Cheese
2 Pieces of French or Italian loaf (substitute your favorite bread if desired).3 Slices of Mozzarella
2 Slices of Cheddar
2 Slices of Gouda
2 Slices of Swiss
Butter
Preheat a pan to med-low heat. Add cheese to one side of the bread and cover with the other piece. Butter the outside of the piece of bread on top. Place in pan butter side down, you should not have any smoke or your pan is too hot, turn it down if you do. Butter the outside of the piece of bread now on top. Cover with a lid to ensure the cheese melts and let cook for about 2-3 minutes. After about 2 minutes check the bottom to determine colour. Once the bread has a nice golden brown crust flip the sandwich. Careful as the cheese may not be melted at this point, hence the sandwich may fall apart. Let cook for another 1-2 minutes covered, checking the bottom to determine when it is ready. Again it should have a nice golden brown colour to it. Dip in ketchup and Enjoy!!
Click Here to Read More..
Labels:
cheddar,
gouda,
grilled cheese,
mozzarella,
organic,
recipe,
sandwich,
video
Sunday, July 26, 2009
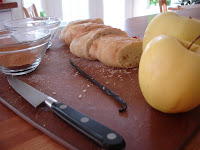
Recipe: French Toast with Sauteed Apples & Mimosas
Recipe: French Toast with Sauteed Apples
The Apple Syrup: Ingredients
3 yellow delicious apples (or other baking apple that will hold their share when heated, but of course we need "Yellow" delicious for the maillot jaune)
1/4 cup brown sugar
3 tbsp butter
2 tsp cinnamon
Pinch of sea salt
French Toast: Ingredients
1 small French baguette
3 eggs
1/4 cup milk
1 tsp cinnamon
1 vanilla bean or 1 tsp of vanilla
1 tbsp of butter
1 Kiwi
Click Here to Read More..
Labels:
apples,
breakfast,
brunch,
french toast
Subscribe to:
Comments (Atom)


