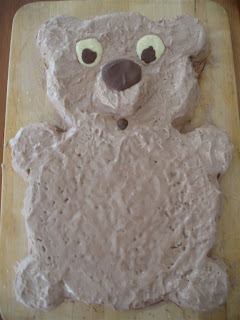
My sons birthdays are 2 weeks apart and that means I had a chance to redeem myself for the design of the rocket ship cake. My youngest, Jack, is turning one tomorrow, hence the afternoon was spent baking and decorating a cake. After the 3-D rocket ship I thought I would try something a little more "down to earth" and easier to pull off. I have to say that my second attempt at baking a birthday cake turned out much cuter than the first and the taste (the part that really matters) is just as good. I used Jacques Pepin's recipe for a basic sponge cake since it came out so beautifully on the rocket ship cake, except this time it will be vanilla and not chocolate. It is a simple recipe containing only 6 eggs, 1/2 cup of sugar, 1/3 tsp of vanilla, 1 cup of flour and 6 tbsp of butter, but it takes a little bit of work and time to get the eggs, sugar and vanilla "as thick as a ribbon". It is well worth the effort however because
  the result is great! With some planning and a pow wow with my wife and sister, we decided to do one large round cake for the body, a slightly smaller cake for the head and seven smaller cakes, cooked in ramekins, for the feet, ears and nose.
For the frosting I wanted to use a chocolate butter cream, although me and chocolate have a love hate relationship (If it is too rich I get a headache), thus I wanted to keep it on the light side and not too rich in chocolate. I started with a Betty Crocker chocolate buttercream recipe, but based on the results from the rocket ship cake, I thought I would change things up a bit. What turned out was a beautifully smooth icing that light and not too sweet. Recipe: Milk Chocolate Buttercream Icing
1 1/3 cup of sweet butter cubed at room temperature
100 grams of melted milk chocolate (I use green and blacks organic)
1 1/2 tbsp of cream cheese
1 tsp vanilla
1 pinch of salt
2 cups of icing sugar
2-3 tbsp of milk
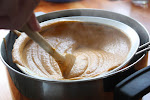
Start by heating the chocolate over a double boiler until just melted, set aside for 5 minutes. Add butter to a bowl and whip with a hand beater or mixer (I used a hand beater) on high for about 1-2 minutes. Add melted chocolate, cream cheese, vanilla and salt and continue to beat for another 1-2 minutes. The objective to ensure everything if very well incorporate and we try to get some air in the mixture. As you whip the mixture more the chocolate will become lighter in colour. Ad the icing sugar 1/2 cup a time, continuing to mix for about 30 seconds before adding another 1/2 cup. At the end, add in the milk one tbsp at time until you achieve the consistency to desire/require to spread on the cake. Once the cakes were cooled down I simply layered on the icing with a spatula and gently spread it around. To try and achieve a bit of fur-like texture, I scrunched up a paper towel and gentle dabbed the icing until I got small peaks. The eyes, nose and mouth were done by melting and cooling some white chocolate and milk chocolate into shape on parchment paper.
Thankfully there were a few trimmings left over from putting the circles together hence we were able to sample the cake early! The result is not only a cute cake but also a wonderfully light (not diet light) and delectable cake. Now we just have to decide if Jack is allowed to have any!
Wednesday, August 19, 2009
Recipe: The Teddy Bear Cake - Birthday Cake Take 2
Subscribe to:
Post Comments (Atom)


4 comments:
thanks just the recipe for my great niece who's one this week Andrea
I think its precious. My kids loved it, and I think making things that look like mommy made them, (without having to go on meds), are perfect. Thanks, Mandy
I'm going to make this for my son, however, I'm going to replace the ears and paws with a different color of frosted cupcake. =)
Might try it someday ;-)
Post a Comment